

 Sign In
 0
0Main content starts here
How to Care for Hiking Boots
Perform maintenance regularly and check the condition of your hiking boots before and after use.
Hiking boots are crucial equipment directly linked to safety in the mountains. Before and after a hike, check the condition of your hiking boots and perform regular maintenance.
For more details, please refer to your product's User's Manual.
Checkpoints for hiking boots
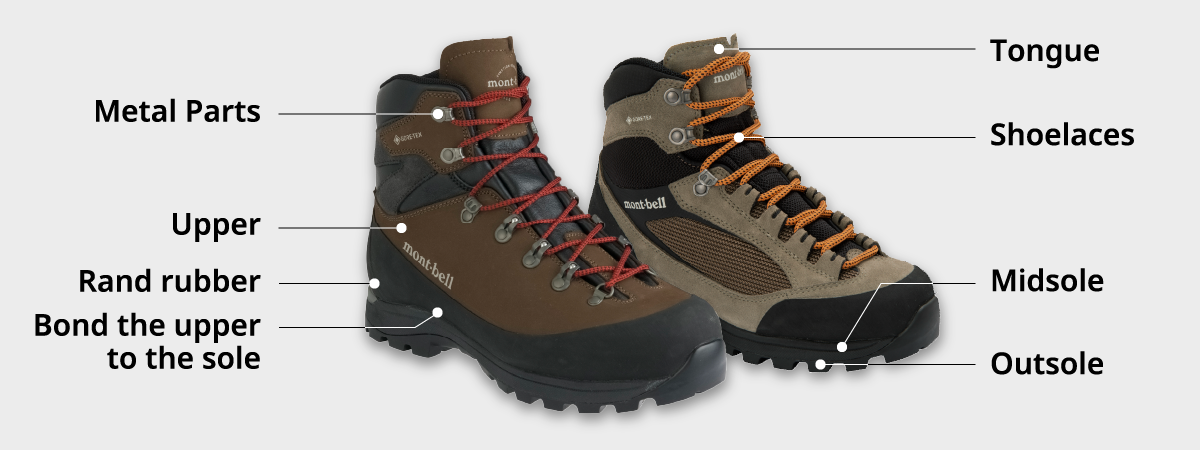
We introduce the parts of your shoes that show wear and tear from use and age-related deterioration. Before going into the outdoors, make sure to check the following points with plenty of time to spare in your schedule.
Tongue
The grooves in soles are places where dirt and dust easily accumulate. If dirt builds up, it can accelerate the deterioration of the material.
Metal Parts
Check if any of the metal parts are loose or rusting. Metal is prone to deterioration from dirt and residual moisture.
Shoelaces
Check if they are worn down due to abrasion or if they've lost their elasticity? Dirt accumulating in the gaps between the metal parts and shoelaces can accelerate deterioration.
Upper
Check for any mold growth, cracking due to leather drying out, or fabric tearing.
Rand rubber
Check for peeling, indicating the adhesive has broken down. If unaddressed, the breakdown of the adhesive will spread. The rand is an important part that reinforces the connection of the upper to the sole. Repairing it quickly is recommended.
Midsole
Check for peeling, indicating the adhesive has broken down. The adhesive that bonds the upper to the sole may suddenly come apart during use due to aging. Dirt and residual moisture can accelerate this deterioration. Use a brush or similar tool to remove dirt, and thoroughly dry the shoes.
Outsole
Check for wear on the heel or toe, or if you notice slipping. Worn-out soles can increase the risk of slipping, so if you notice significant wear, consider resoling or replacing them.
About polyurethane aging and replacing shoe soles
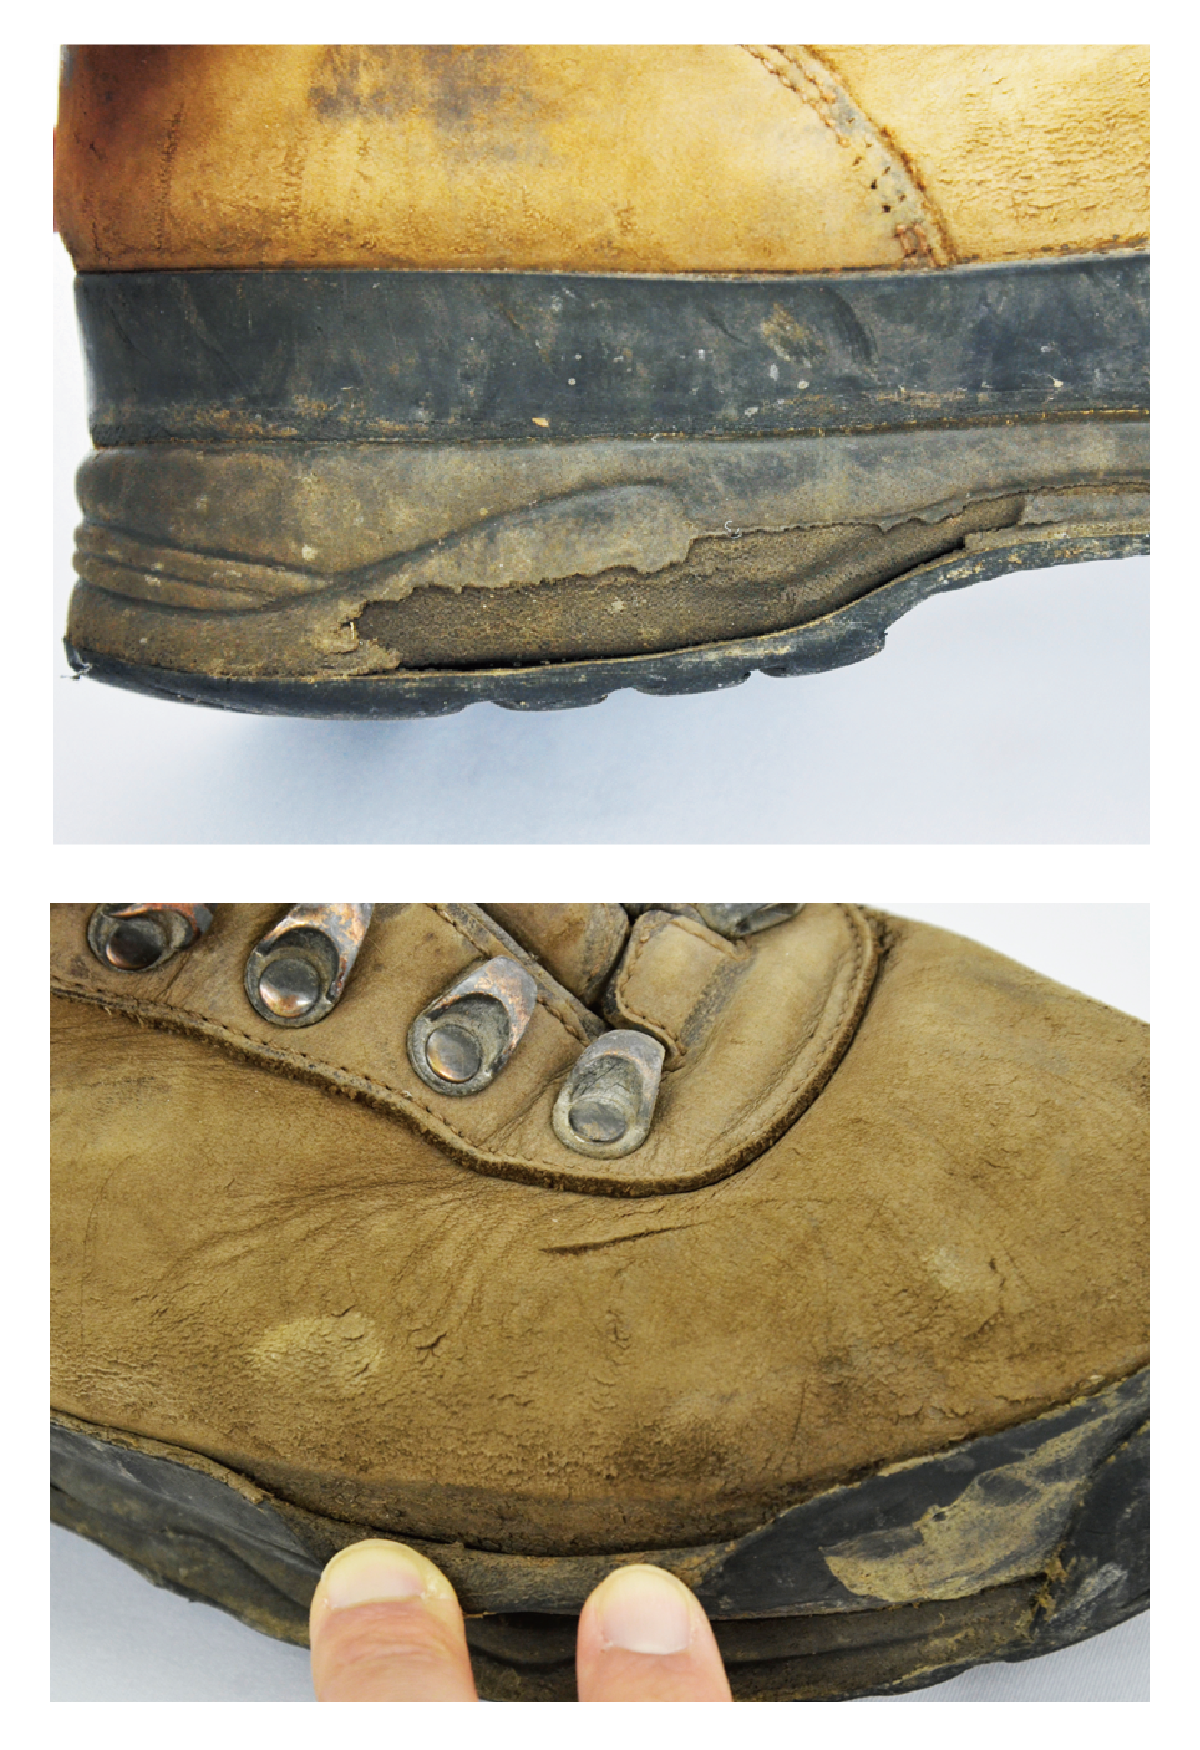
Polyurethane midsoles, which were previously mainstream, degrade regardless of frequency of use, and are generally considered to have a lifespan of about 5 years from manufacture. Currently, midsoles made of EVA, which deteriorates more slowly over time, are mainstream, but polyurethane-based adhesives are still used to bond the upper and sole. Remember to conduct regular inspections.
Montbell (Japan)'s repair service, when replacing the outsole, they also replace the midsole, and if necessary, they will replace the rand rubber as well. (Rand rubber replacement is only possible when replacing the sole.)
Current Montbell hiking boots do not use polyurethane in the midsole.
Montbell (Japan)'s repair service, when replacing the outsole, they also replace the midsole, and if necessary, they will replace the rand rubber as well. (Rand rubber replacement is only possible when replacing the sole.)
- Limited to Montbell and Asolo brand boots.
- Some products do not support outsole replacement. Please check the Montbell catalog or product pages on the website, or consult with a retailer or Customer Service.
Repair Prices for Hiking Boots
Please refer to for more details.
Care after hiking
How to clean hiking boots
For regular maintenance, please remove dirt by brushing or wiping the surface with a well-wrung cloth. If the dirt is particularly stubborn, use Montbell's multi-cleaner.
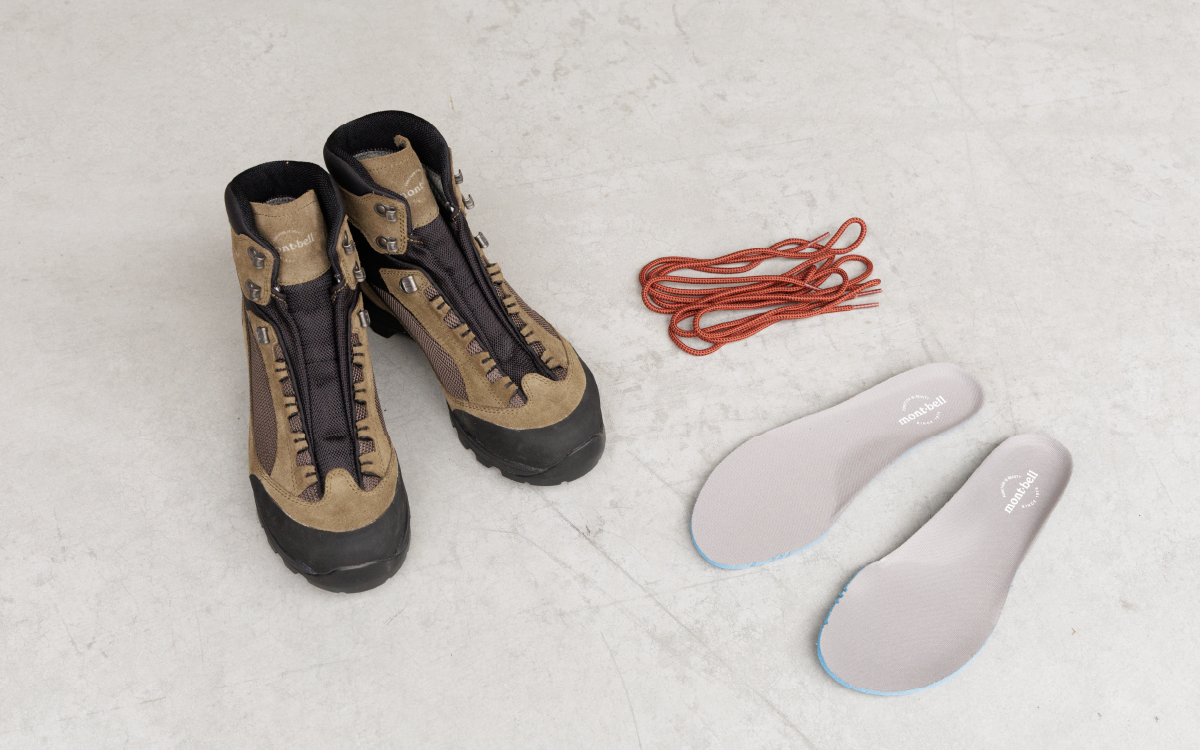
1. Insole and shoelaces
Remove the insoles and shoelaces. Insoles and shoelaces can be easily washed in a washing machine using a laundry net. By removing the insoles as soon as possible after use, it becomes easier to dry the inside of the shoes.
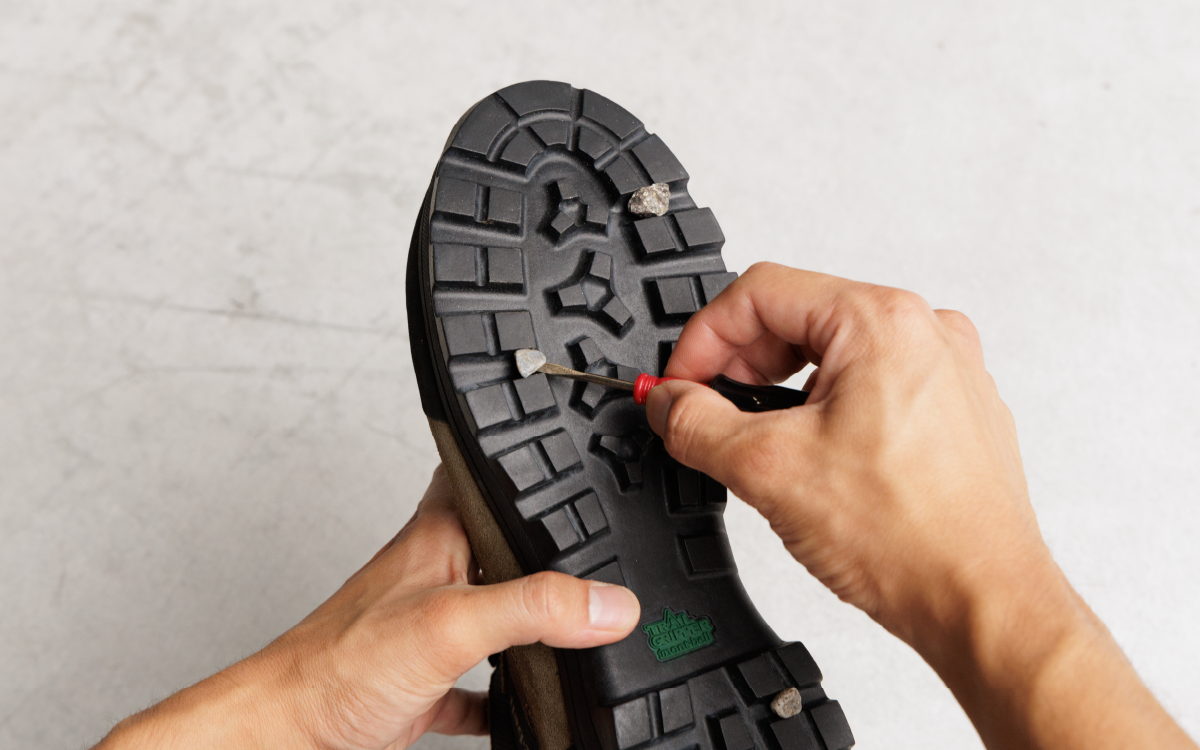
2. Outsole
Clean the outsole with water. For stubborn dirt, use an old toothbrush, and for stones stuck in the sole, a flathead screwdriver can easily remove them.
Please be careful not to injure your hands or damage the sole with the flathead screwdriver.
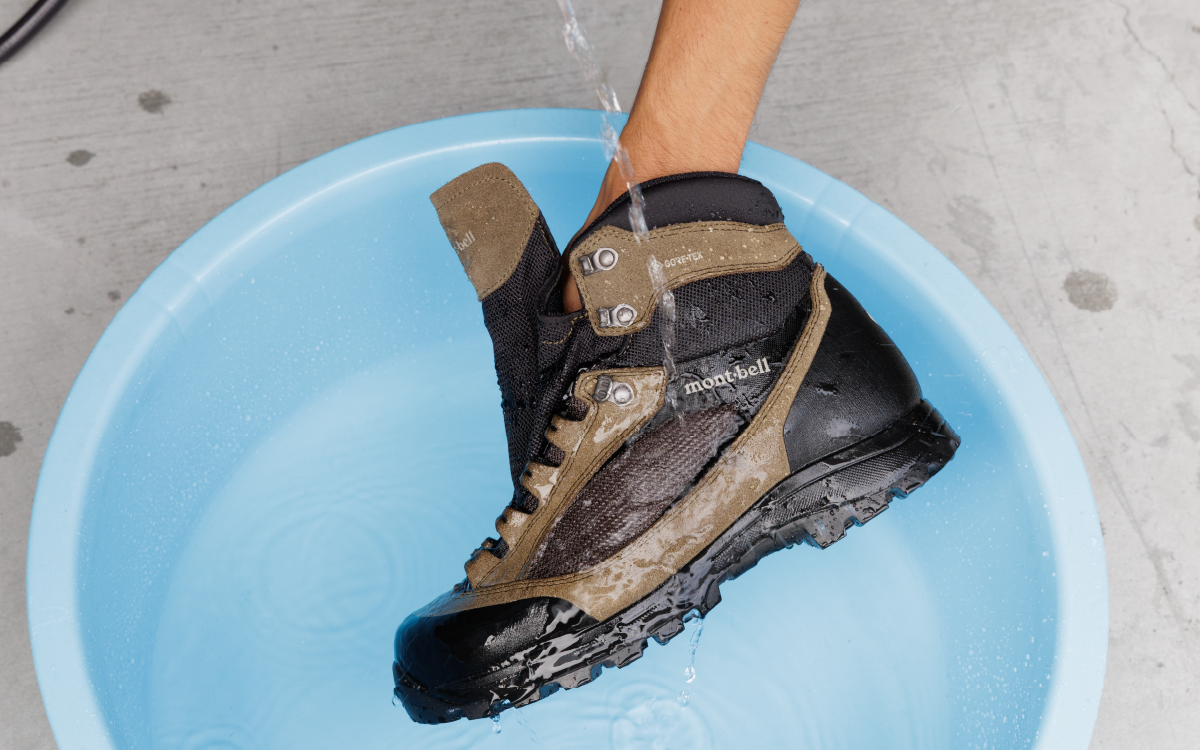
3. Wet the entire shoe
Submerge the entire shoe in a wash basin filled with water. Since natural leather is not homogeneous, differences in water absorption can easily occur, which may result in mottled stains after drying. Be sure to thoroughly saturate the leather with water at the beginning.
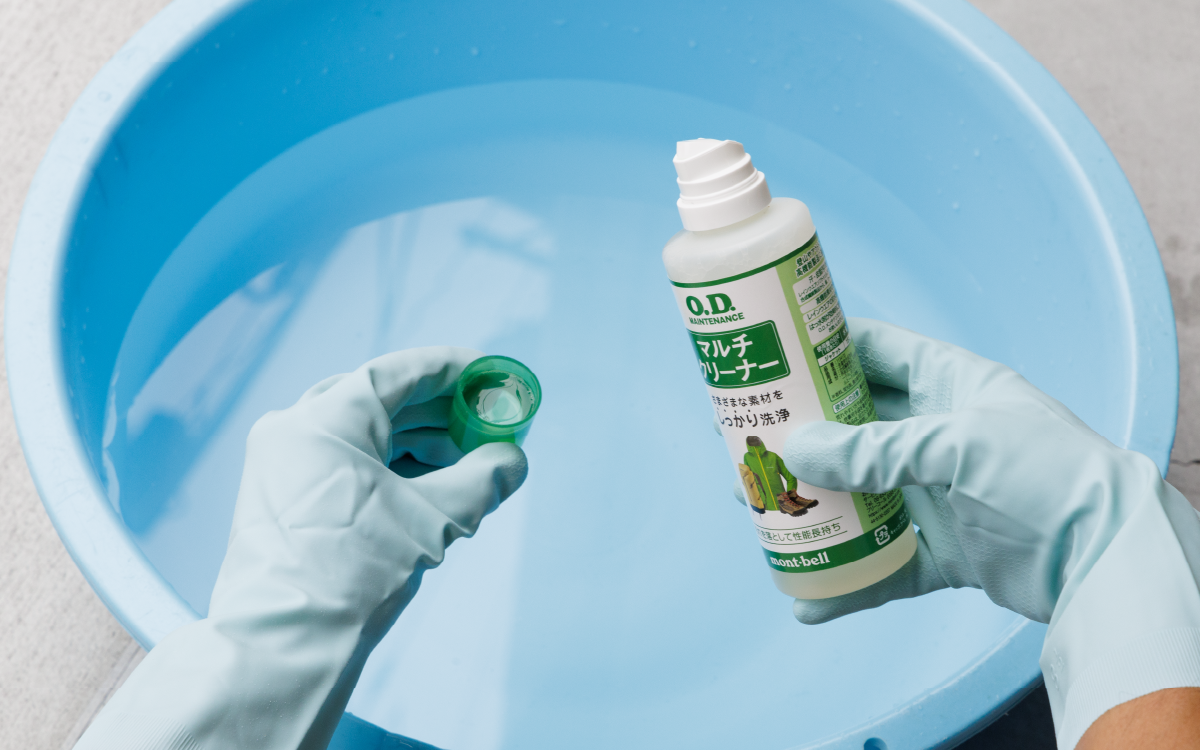
4. Prepare the cleaning solution
Fill a bucket with enough water to fully submerge the shoes (about 5-8 liters) and add one capful (15mL) of multi-cleaner to create the cleaning solution.
As the multi-cleaner is a concentrated type, applying it directly to a sponge for cleaning may cause discoloration due to the strong cleaning agents. Even when spot cleaning, always use a diluted cleaning solution.
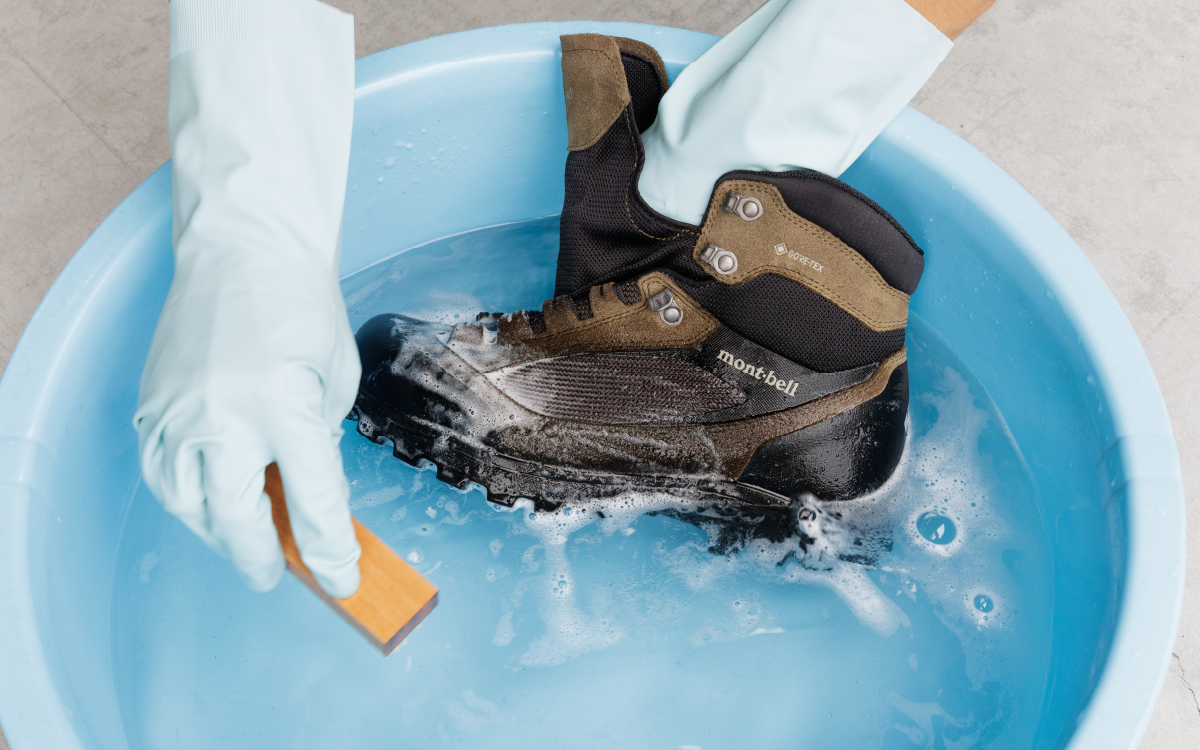
5. Cleaning
Immerse the entire shoe in the cleaning solution while using a sponge or shoe brush to scrub off surface dirt. For Montbell hiking boots, it is safe to clean the inside of the shoe with the cleaning solution. If the inner lining is leather, wipe off the dirt to clean it. If it's a fabric type, brush out the dirt.
When applying a brush to leather parts, please use one suitable for the material. Excessive brushing may cause scratches and reduce water repellency.
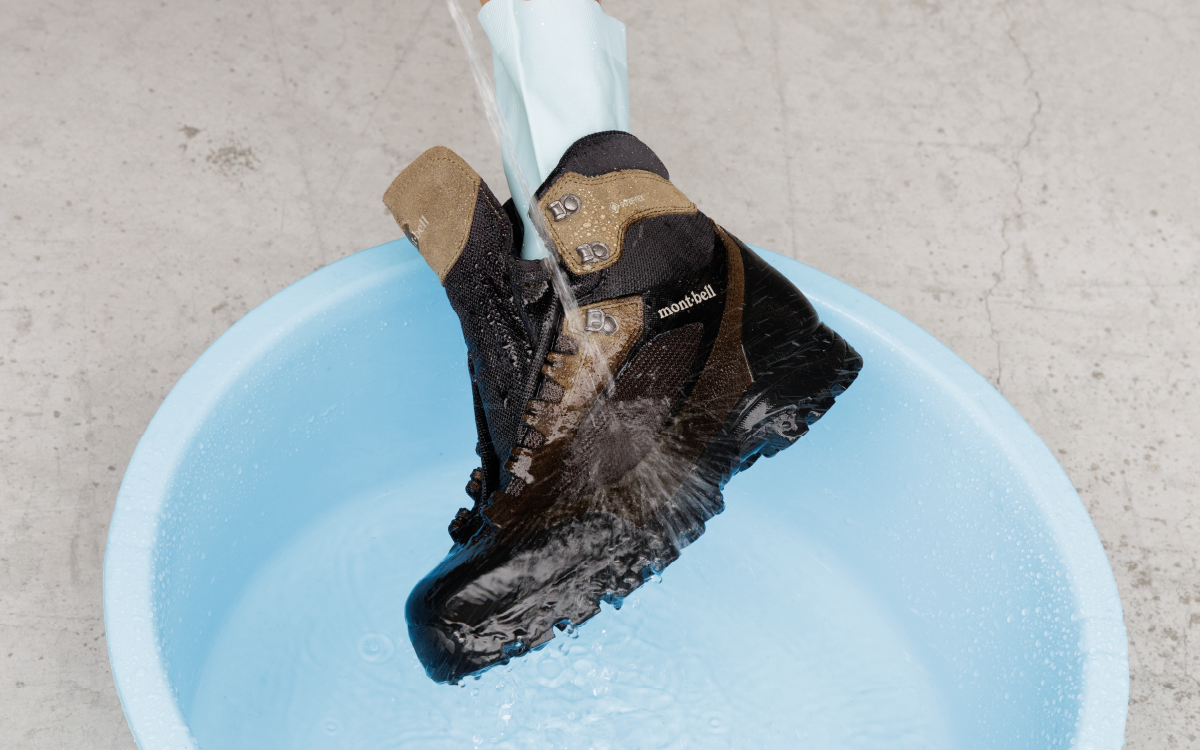
6. Rinse
After washing the entire shoe, rinse it thoroughly.
Brush & Cleaner
Drying
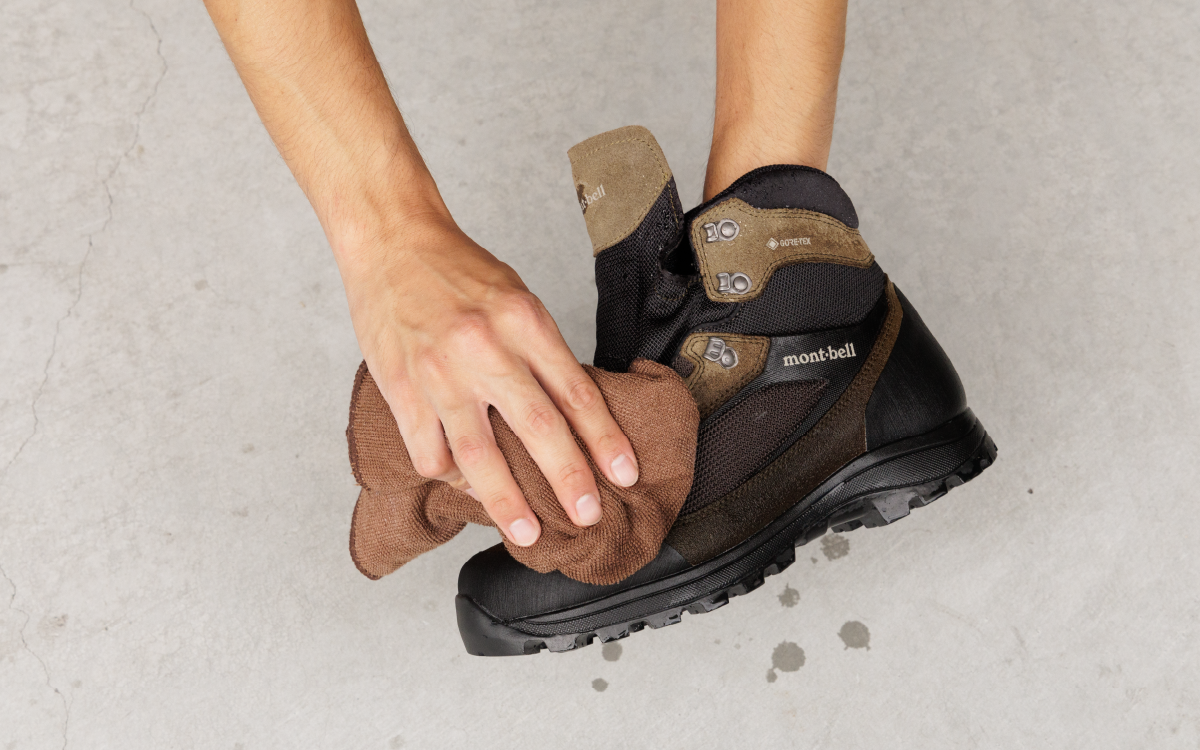
7. Wipe dry
After rinsing, thoroughly wipe off all moisture, including the inside of the shoes, with a towel or similar. Press the towel firmly against the shoe from both the outside and inside, as if squeezing, to remove moisture from inside the upper.
- Drying the shoe while it contains a lot of moisture may cause stains.
- Please note that when wiping, the dye from the leather parts may transfer color to the towel.
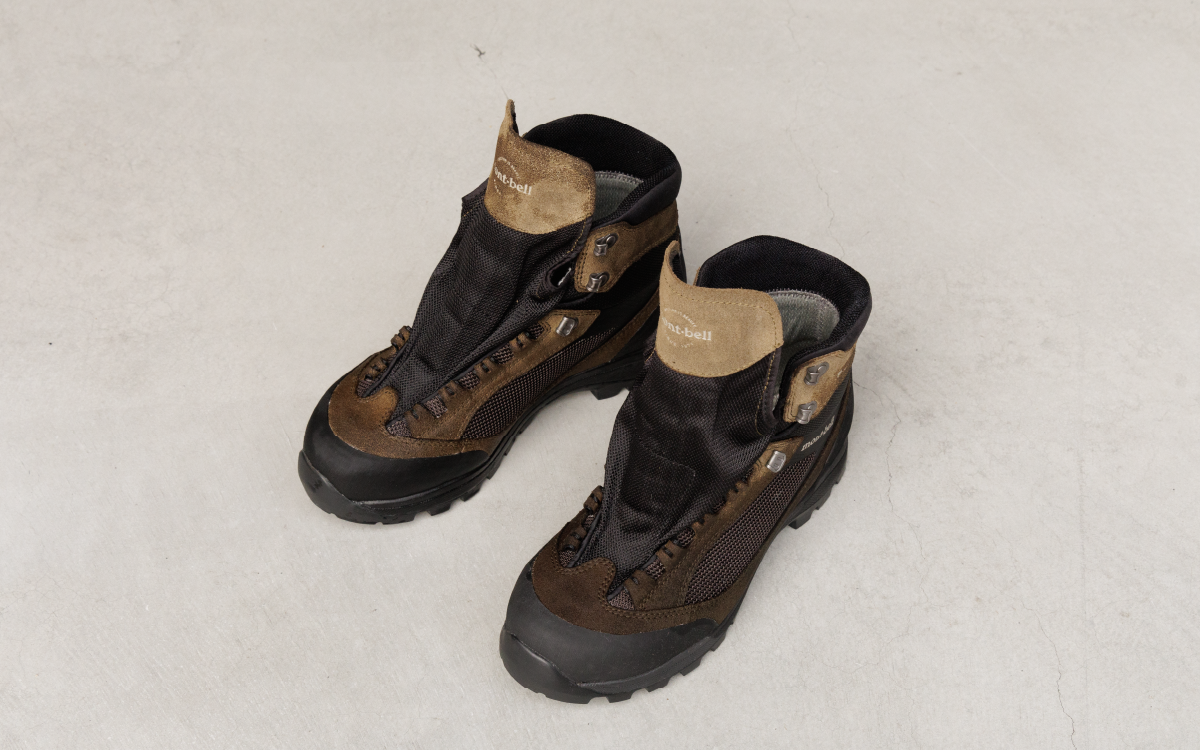
8. Lay flat
Avoid direct sunlight and place the shoes flat in a well-ventilated shaded area to dry for 2-3 days. If there is still moisture inside the shoes, insert shoe drying desiccant (silica gel packs) into the shoes to aid drying.
- Rapidly drying the leather parts of hiking boots using direct sunlight or heaters after they get wet can cause cracking and hardening of the leather.
- Placing the boots at an angle or hanging them to dry may cause water to accumulate in certain areas, potentially leading to stains.
How to apply water-repellent treatment
After removing dirt and drying thoroughly, apply water-repellent treatment. Below we explain the different procedures based on your shoe's materials.
Applying water repellent while the product is soiled may prevent it from performing as intended.
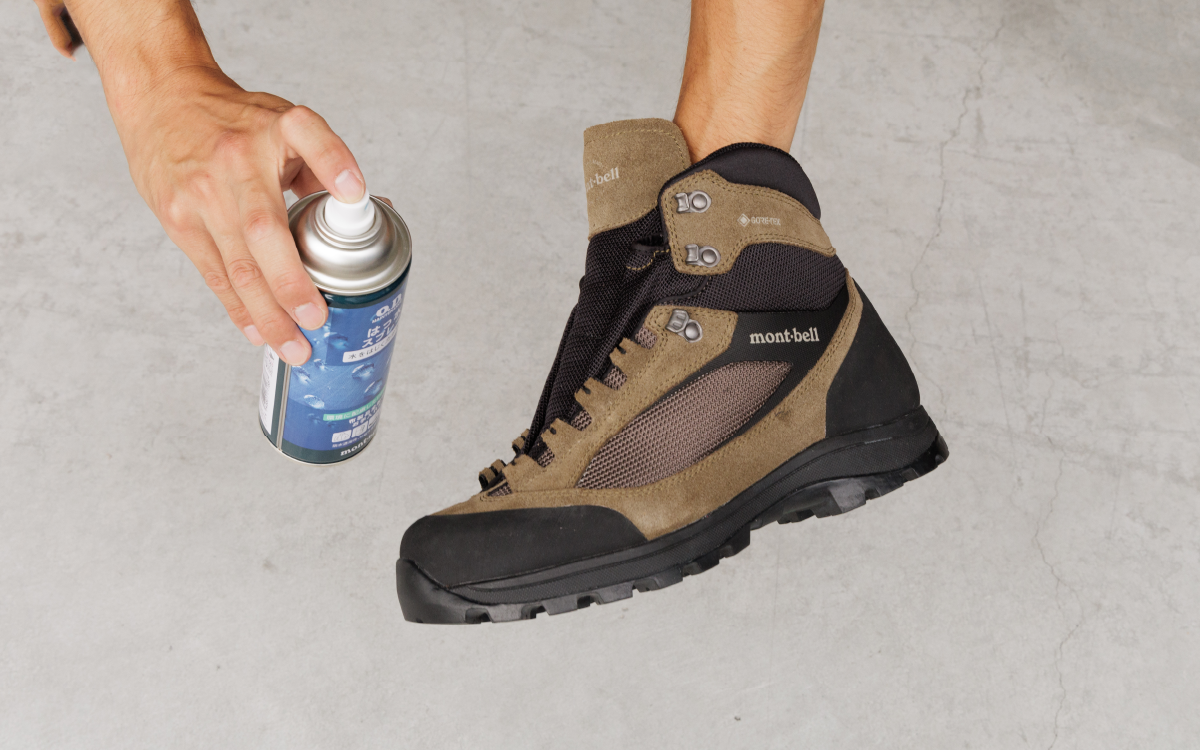
Boots made of fabric (textile) or synthetic leather
After removing dirt and drying, apply a water-repellent spray. If leather parts are used, apply a leather protectant (such as leather water repellent) to the leather portions as needed. Then, apply the water-repellent spray to the entire surface. There are also water-repellent agents that can be used on both nubuck, suede, and fabric (textile).
If stains appear on leather parts, applying leather conditioner can make them less noticeable to some extent. However, applying too much may cause partial darkening of the color or lead to sole or rubber separation.
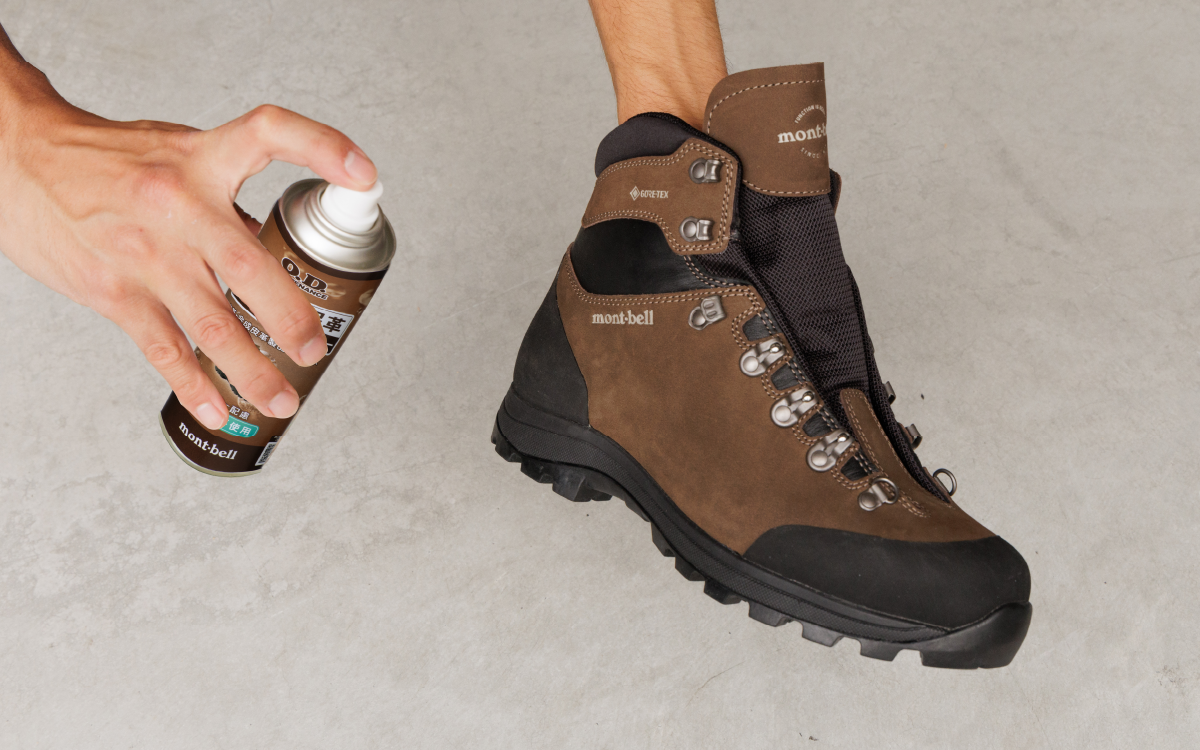
Leather boots
After removing dirt and drying, first apply leather conditioner. Then, apply water repellent spray and allow it to air dry. Using a spray-type water repellent that includes leather conditioner can save you the trouble of applying the conditioner separately.
- For nubuck or suede, using a water repellent with leather conditioner may change the texture. Please test it on an inconspicuous area before applying it to the entire surface.
- A thin application of oil or leather conditioner is sufficient when you feel the leather surface has become dry. Over-application may cause the shoes to lose their shape or make it impossible to resole them.
Leather Oil
Water-repellent agent containing leather conditioner
Water-repellent agent without leather conditioner
- Please be sure to use water-repellent spray outdoors in a well-ventilated area.
- Please read the instructions and any warnings that come with each water-repellent agent carefully before use.
Shoe Repair Adhesive
Boot Care Kit
Storage
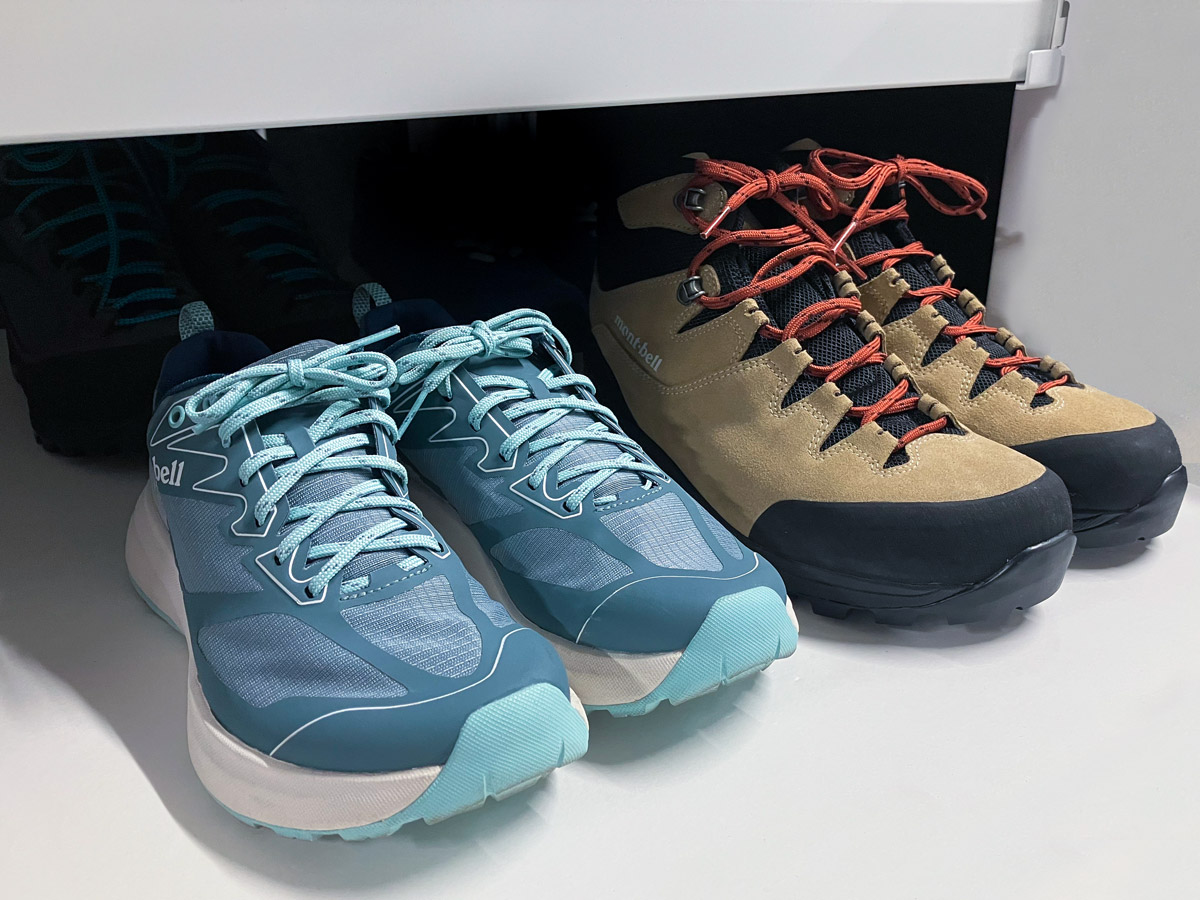
Store in a well-ventilated, cool, dry place out of direct sunlight.
Do NOT store in the following places, as it may cause damage to the shoes.
- In poorly ventilated containers such as the original shoe box or a storage bag
- In places that can become hot, like inside a car or outdoor storage shed/garage
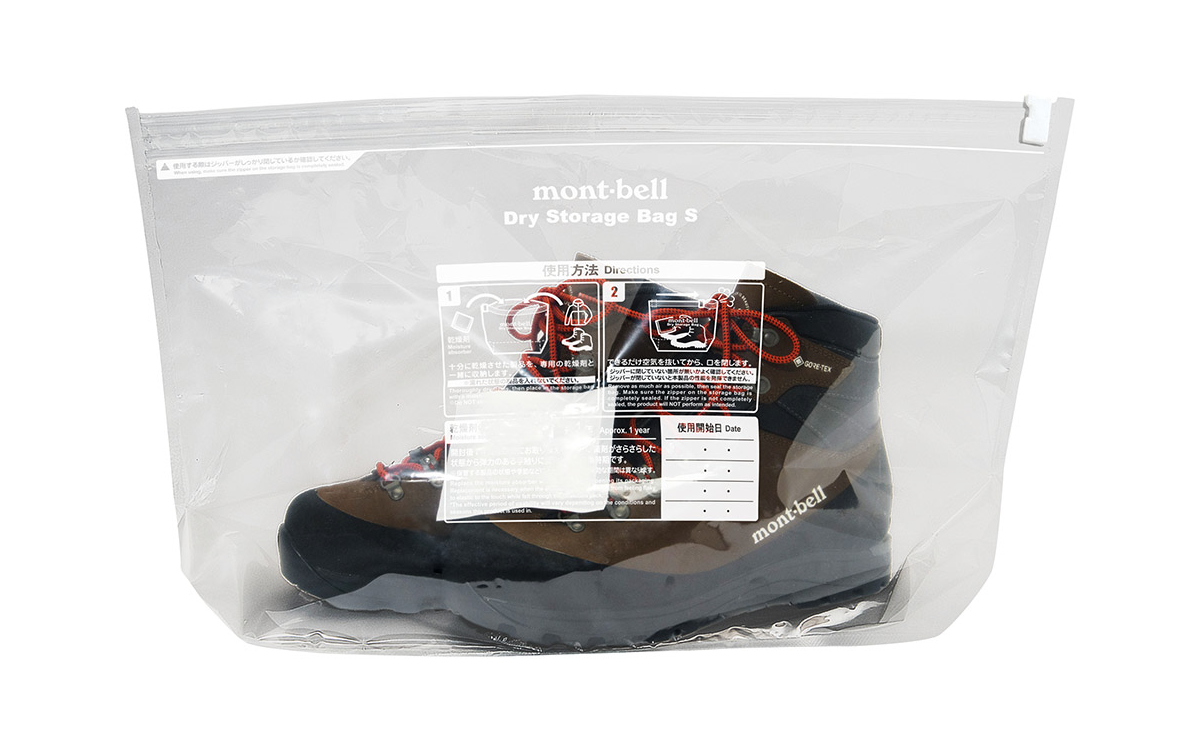
Storage method using a dry storage bag
By using a dry storage bag, you can protect your hiking boots from moisture and reduce deterioration from hydrolysis.
Please store after completely drying.
Odor control for footwear interior
If you're concerned about odor from your shoes, use O.D. Maintenance Antibacterial Deodorizing Spray (sales restricted to some countries). It reduces and eliminates odor-causing bacteria, providing excellent deodorizing and antibacterial effects. You can also use it preventively before odors start to develop.
For enjoying a comfortable hiking experience
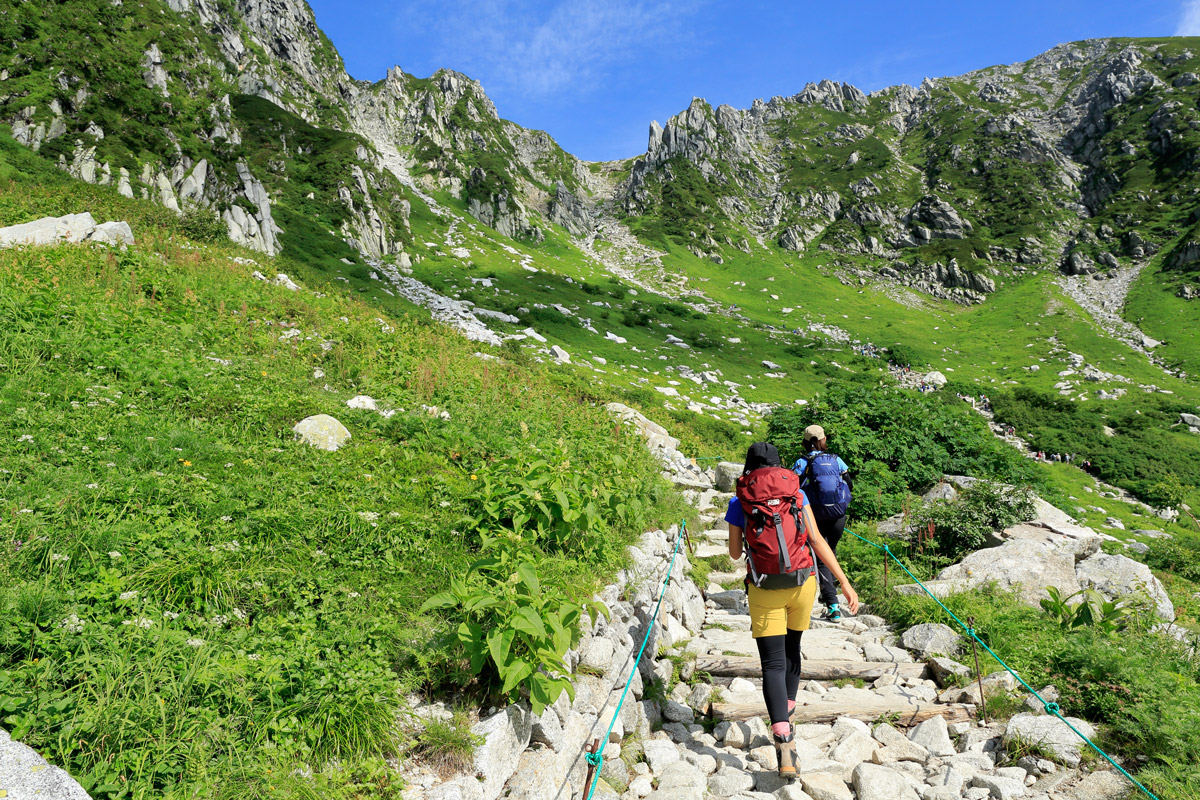
Shoe problems in the outdoors can potentially lead to serious situations. It can be said that the ideal relationship with your equipment is one where you perform proper maintenance regularly and can quickly notice any abnormalities if they occur.


